In this article, we will be creating a basic CRUD application using Flask. CRUD app means an application that has functionalities for creating, reading, updating, and deleting data. Let’s create a to-do list that has all these functionalities.
If you know the fundamentals of Flask, then great! It will be very easy for you to follow along with this tutorial. If you don’t know the basics and how to set up Flask on your system, I would recommend you check out the article that I’ve written on the topic Introduction To Flask Web Framework.
If you’re good with the basics and you have the setup ready, let’s start building the web application.
Start
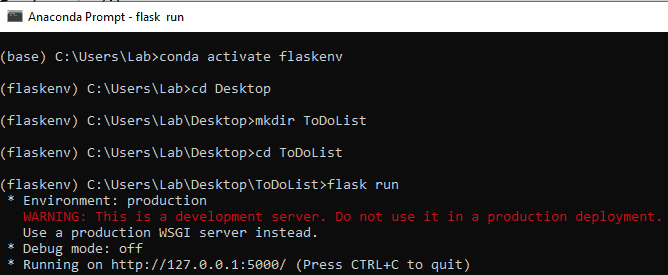
First of all, create a new folder called ‘ToDoList’ for this project. Open your command prompt or terminal and navigate to that folder using the ‘cd’ command.
Now, go ahead and open your IDE or code editor and open that folder there.
Create a new file called ‘app.py’. Now, let’s just write the basic code to print a “hello world” on the screen.
from flask import Flask

app = Flask(__name__)

@app.route('/')
def home():
    return "Hello World"

if __name__ == "__main__":
    app.run(debug=True)
debug=True will make sure the app will run on the development server.
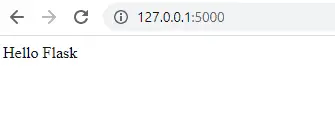
Now, let’s go ahead and run this code.
flask runWe don’t need to specifically set the FLASK_APP variable if we use the name “app.py” for our file since it is the standard name. Flask is smart enough to find that file and run it without specifying the name of the file.
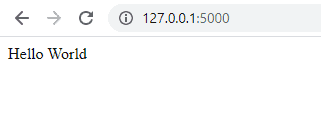
Now, copy-paste the URL into a browser. You’ll get an output like this:
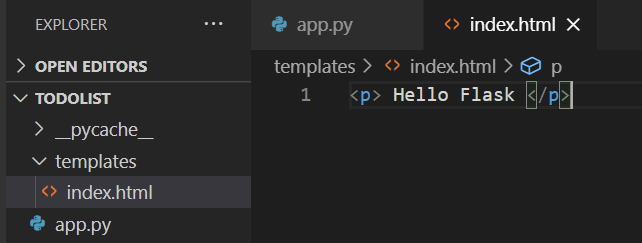
Now, let’s use templates. Create a folder called ‘templates’ in your project folder. Create a new file called ‘index.html’.
Let’s write something there in that file.
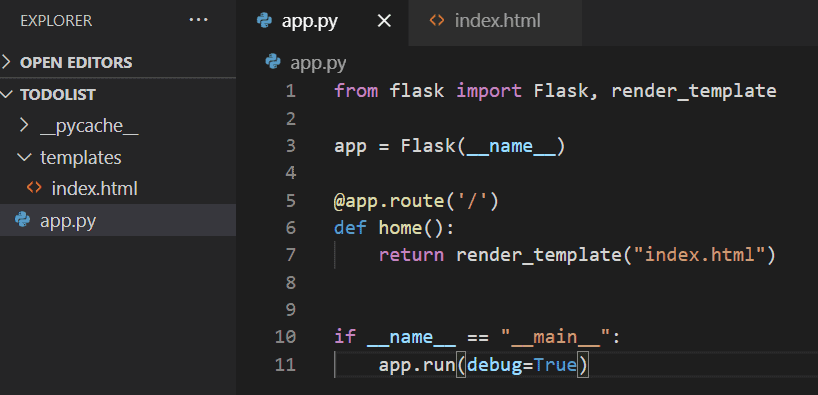
Now, open the app.py file and display this HTML file instead of the “hello world” string. We can use the render_template module for doing that.
Now, the app will display this HTML file. Refresh the web page and check the output. If it didn’t work, run the app again.
Template Inheritance
Template inheritance allows you to reuse an HTML file for other pages. You can create one master HTML file that has the skeleton of what each page is going to look like, and you can inherit that to other pages. So, it reduces the line of codes that we need to write.
This is done with the help of the Jinja template engine. Flask uses Jinja for its template functionalities.
Create a new file called ‘base.html‘ inside the templates folder. This file will be our base template.
Let’s create some boilerplate code in this file. Also, create some blocks using Jinja code.
<!DOCTYPE html>
<html lang="en">
<head>
    <meta charset="UTF-8">
    <meta name="viewport" content="width=device-width, initial-scale=1.0">
    {% block head %}


    {% endblock %}

</head>
<body>
    {% block body %}


    {% endblock %}

</body>
</html>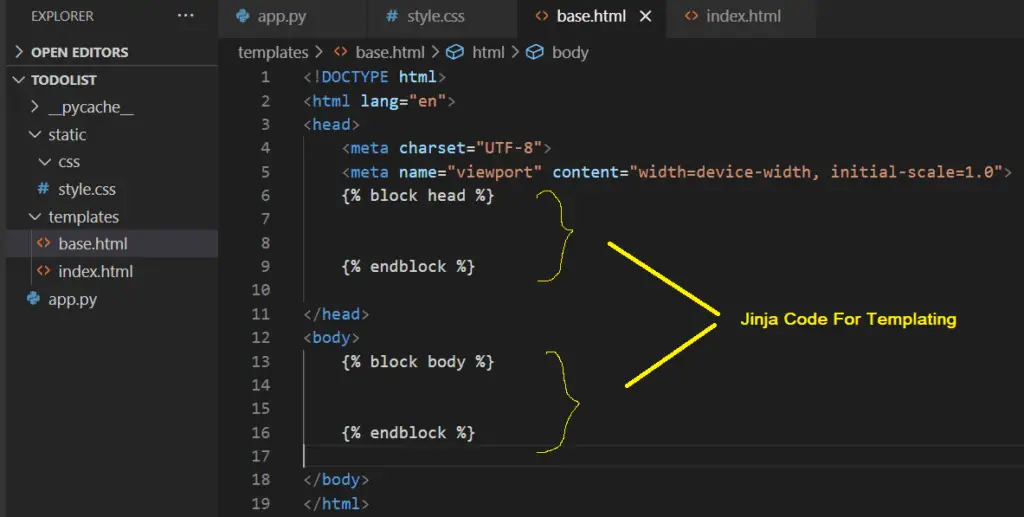
Now, we can open the index.html file and inherit the base.html file to it using the keyword ‘extends‘. That will import all the boilerplate code to this file. Now, we don’t need to write any of those things here. We can just use the blocks and write what we need.
{% extends 'base.html' %}
{% block head %}
{% endblock %}
{% block body %}
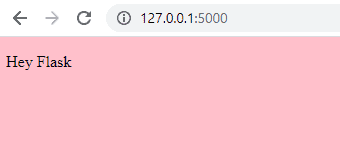
<p> Hey flask </p>
{% endblock %}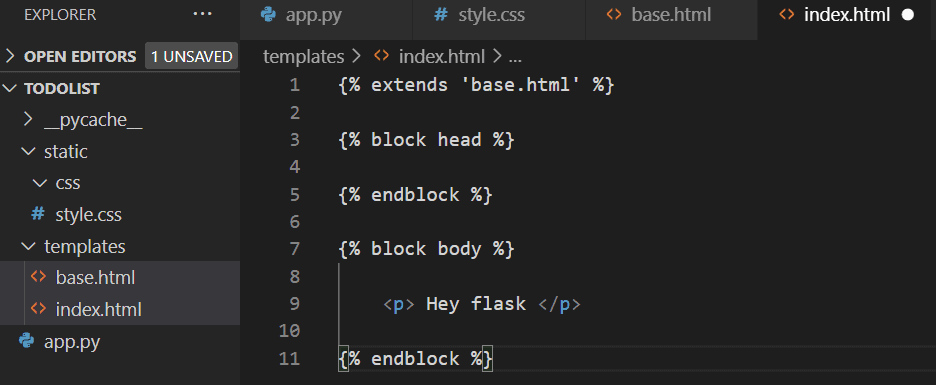
Now, if we go ahead and run the app, we’ll get an output like this:
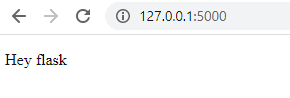
So, our templates are working just fine.
Static Files
Now, let’s see how we can work with static files.
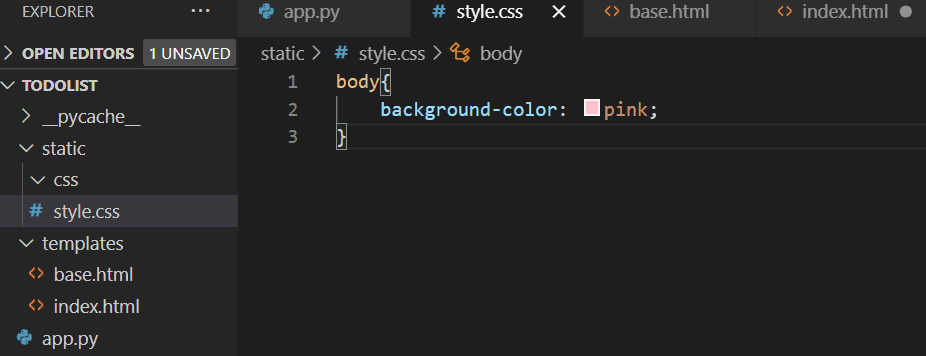
Create a new folder called ‘static’ in the project directory. Open that folder and create a new folder called ‘css’. Inside that, create a new file called ‘style.css’.
Write a CSS rule just to make sure that it is connected to the HTML page.
Now, let’s go to the base.html file and link the CSS file with it.
Add the following line of code inside the head tags.
<link rel="stylesheet" href="{{ url_for('static', filename='css/style.css') }}">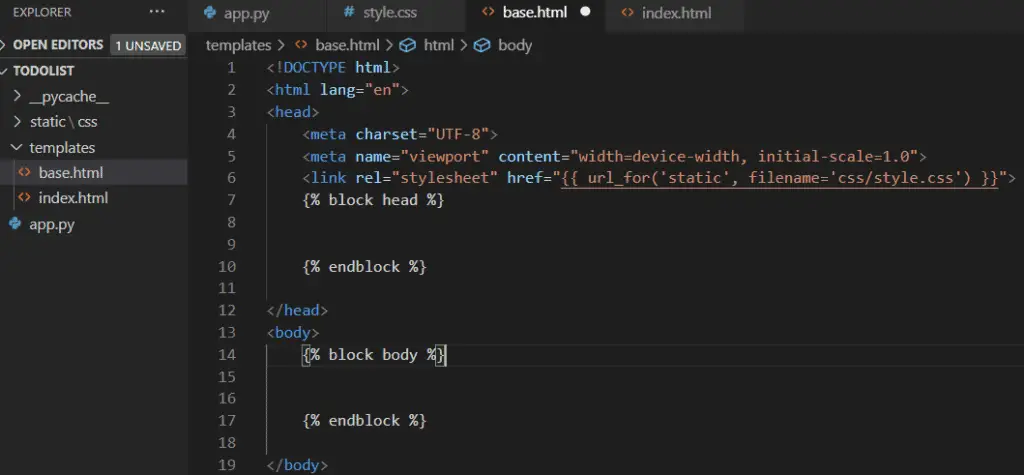
We use the Jinja code here as well. Also, we use the ‘url_for’ method to specify the path.
We can link Javascript files as well using a similar method.
Now, let’s refresh the web page and check whether the style rules are present on the HTML page.
So, the CSS and HTML files are linked together.
Databases
Now, let’s try to implement a database on our Flask application. We will use SQLAlchemy ORM and SQLite database for this app.
SQLAlchemy is an ORM (object-relational mapper) that helps to map the user-defined Python classes with the database tables. It provides all the powers of SQL and converts function calls to SQL statements.
You can install the flask-sqlalchemy module on your system using the following command:
pip install Flask-SQLAlchemyNow, open the “app.py” file and add the following code.
from flask_sqlalchemy import SQLAlchemyJust after the app variable initialization, add a config method. This will tell Flask where the database is located.
app.config['SQLALCHEMY_DATABASE_URI'] = 'sqlite:///test.db'We’re using SQLite for the database. We use /// to specify the relative path whereas //// will specify the absolute path.
Now, we need to initialize the database.
db = SQLAlchemy(app)Now, let’s create a model and define the columns that we need. We will have two columns (id and content) for this model.
class Todo(db.Model):
    id = db.Column(db.Integer, primary_key=True)
    content = db.Column(db.String(300), nullable=False)

    def __rep__(self):
        return '<Task %r>' % self.id
We’ve also defined a function that will return a message every time we create a new element.
Whenever we make a new element, this function will return a task and the id of that task.
Now, let’s set up the database. Start an interactive Python3 shell. Go to the app directory and type ‘python’ on the prompt to start it.
Now, type in the following commands to create the database.
from app import dbdb.create_all()exit()
Once you’ve done this, you’ll see a new file called ‘test.db’, which has been created inside the app folder.
Creating Tasks
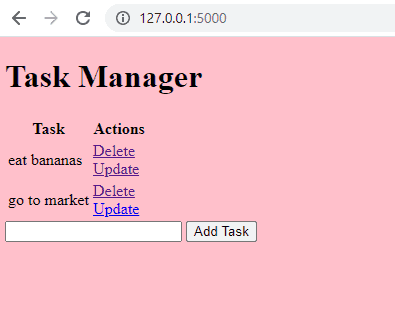
Now, it’s time to create the tasks. For that, we need to create a table to display all the tasks on the homepage.
Go to index.html and create a table.
<table>
        <tr>
            <th>Task</th>
            <th>Actions</th>
        </tr>
        <tr>
            <td></td>
            <td>
                <a href="">Delete</a> <br>
                <a href="">Update</a>
            </td>
        </tr>
    </table>
Now, let’s create a form to enter the task.
 <form action="/" method="POST">
        <input type="text" name="content" id="content">
        <input type="submit" value="Add Task">
</form>
Since we’re using the POST method, we need to add it to the route.
Go to app.py and add it to the route. By default, the route only has the GET method.
@app.route('/', methods=['POST','GET'])Now, we will write the logic to add tasks to the database.
@app.route('/', methods=['POST','GET'])
def home():
    if request.method == 'POST':
        task_content = request.form['content']
        new_task = Todo(content=task_content)

        try:
            db.session.add(new_task)
            db.session.commit()
            return redirect('/')
        except:
            return 'There was an error while adding the task'

    else:
        tasks = Todo.query.all()
        return render_template("index.html", tasks=tasks)
Now, open the index.html and add some Jinja templating to loop through the database and display all the tasks on the table.
Don’t forget to import the methods ‘request’ and ‘redirect’ from flask.
    <table>
        <tr>
            <th>Task</th>
            <th>Actions</th>
        </tr>

        {% for task in tasks %}
        <tr>
            <td>{{ task.content }}</td>
            <td>
                <a href="delete/{{task.id}}">Delete</a> <br>
                <a href="update/{{task.id}}">Update</a>
            </td>
        </tr>
        {% endfor %}
    </table>
Now, we have completed the creation part of our CRUD app.
Deleting Tasks
Go to “app.py” and create a new route for deleting tasks.
@app.route('/delete/<int:id>')
def delete(id):
    task_to_delete = Todo.query.get_or_404(id)
    try:
        db.session.delete(task_to_delete)
        db.session.commit()
        return redirect('/')
    except:
        return 'There was an error while deleting that task'
Now, let’s go to index.html and add the URL for the delete button.
<a href="delete/{{task.id}}">Delete</a> <br>That’s it. We’ve completed the delete part of the app.
Updating Tasks
Go to app.py and create a new route for updating tasks.
@app.route('/update/<int:id>', methods=['GET','POST'])
def update(id):
    task = Todo.query.get_or_404(id)

    if request.method == 'POST':
        task.content = request.form['content']

        try:
            db.session.commit()
            return redirect('/')
        except:
            return 'There was an issue while updating that task'

    else:
        return render_template('update.html', task=task)
Go to index.html and add the link for the update button.
<a href="update/{{task.id}}">Update</a>Now, we need to create another HTML page for updating the tasks.
Create a new file called ‘update.html’ within the templates folder. Add the following code to it.
We passed the task from the route to this URL.
{% extends 'base.html' %}

{% block head %}
<title>Task Manager</title>
{% endblock %}

{% block body %}

<div class="content">
    <h1>Update Task</h1>
    <form action="/update/{{task.id}}" method="POST">
        <input type="text" name="content" id="content" value="{{task.content}}">
        <input type="submit" value="Update">
    </form>
</div>

{% endblock %}
Now, we’re done with the updating part of the CRUD app.
Final Touches
If there are no tasks, we need to display a message on the homepage. For that, we will add the following logic to the table in the index.html file:
    {% if tasks|length < 1  %}
    <h4>There are no tasks. Create one below!</h4>
    {% else %}
    <table>
        <tr>
            <th>Task</th>
            <th>Actions</th>
        </tr>

        {% for task in tasks %}
        <tr>
            <td>{{ task.content }}</td>
            <td>
                <a href="delete/{{task.id}}">Delete</a> <br>
                <a href="update/{{task.id}}">Update</a>
            </td>
        </tr>
        {% endfor %}
    </table>
    {% endif %}
That’s it. The app is ready with CRUD functionalities.
Go ahead and run the app and check its functionalities.
I know the app looks ugly. But I don’t care. I just wanted to learn the CRUD functionalities using Flask. I got some basic ideas about the framework now. Hopefully, I’ll take this knowledge and build something new using Flask.