Let’s start learning the template extending in Django step-by-step.
What is meant by template extending in Django? The idea of template extending is that we create some base files for the entire website and we can re-use them in other files whenever needed.
Template extending helps when you want to use the same information or code in more than one place.
Let’s explain template extending in Django with an easy example. Consider that you have a website. You have a navigation bar for that website, which is re-used in all of your pages.
If you want to make a change to your navigation bar, you can change that in your base file and that will automatically make the changes in other pages that use this navigation bar file.
That means you don’t need to change the code for the navigation bar on all pages. You just need to change it only in the base file.
You got the idea, right? If you haven’t, don’t worry. I hope you will get the idea while doing this project. I broke down the project into a few simple steps.
I firmly believe that learning more is effective when you learn by doing. So, let’s stop the boring theories apart and start doing a simple project. This will make you understand the concepts much better.
So, if you are ready to go with this new project, let’s start learning the concept of template extending in Django right away with a cool project.
Step.1
Create a new folder called Project2. Open your command line/prompt and navigate to that folder using the ‘cd’ command.
Start a new project there using the following Django command. Let’s name our project as ‘mytemplate’.
django-admin startproject mytemplateGo inside mytemplate folder using the “cd” command and create a new app. Let’s call our app ‘mywebsite’.
python manage.py startapp mywebsite If you are a MAC/Linux user, type in python3 instead of python.
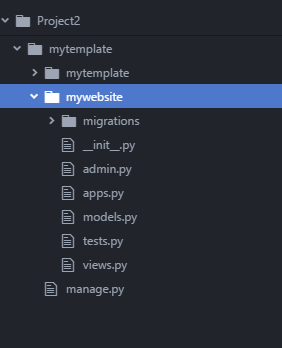
Go back to your IDE and open the ‘mytemplate’ folder. Now you will see some files and folders are created in your project folder.
Step.2
Inside the mytemplate folder, create a new folder called ‘templates’. Inside that folder, create a new file named ‘home.html’.
Add the following line of code to that file.
<h1> This is my website homepage </h1>Step.3
We need to let our project know that we have created a new templates folder. So, open settings.py file.
Inside that, there is a TEMPLATES list. You can see that the DIR section in that list is empty by default.
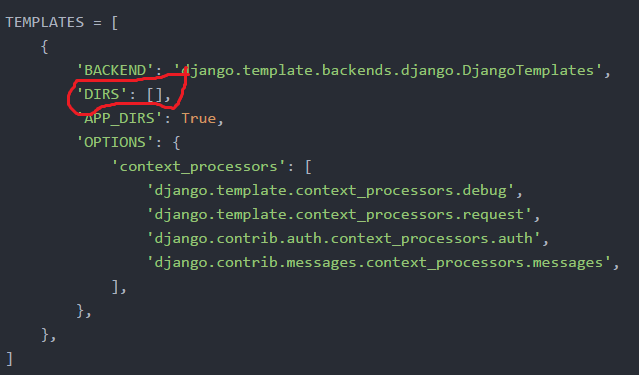
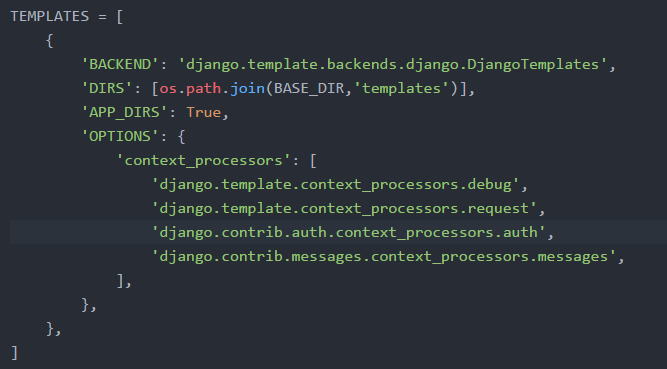
Make the following change to the DIR.
'DIR' : [ os.path.join(BASE_DIR,'templates') ]Here, we told the base folder that looks into the ‘templates’ directory for all the template files.
Step.4
Open views.py file which is inside the mywebsite folder. Here, we are going to create a class-based view. Add the following lines of code to that file.
from django.views.generic import TemplateView

class HomePageView(TemplateView):
    template_name = 'home.html'
Step.5
Create a new file named ‘urls.py’ inside the mywebsite folder. Add the following lines of code to that file.
from django.urls import path
from . import views
urlpatterns = [
    path('',views.HomePageView.as_view(),name='home')
]
Step.6
We have to mention the base urls.py file that we created a new urls file inside mywebsite folder. So, go to mytemplate folder and open urls.py. Add the following line of code inside the urlpatterns.
path('',include('website.urls')),Also, import the include method from django.urls before using it.
from django.urls import path,include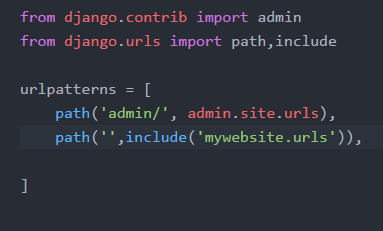
Step.7
Now, open your command line again and navigate to mytemplate folder. Let’s run the project.
python manage.py runserverIf you are a MAC/Linux user, type in python3 instead of python.
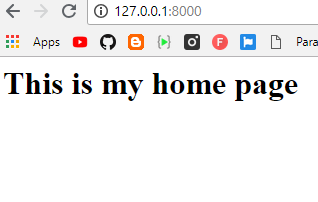
You will see that a URL is created in your command line. Copy that URL and paste it on a new tab of your browser and hit ‘Enter’.
You will see your homepage on your browser. Thus, we were able to render some HTML code from a file successfully.
So, the first part of our project is done. Take a deep breath and a small break if you need it.
Next, we are going to create an about us page, a contact us page, and a navigation bar for our website.
Adding an ‘About-us’ page
Let’s add an about us page to our website using 3 simple steps.
Step.1
Create a new file called ‘about.html’ inside the ‘templates’ folder. Add the following line of code to that file.
<h2> This is my about us page</h2>Step.2
Open the ‘views.py’ file which is inside ‘mywebsite’ folder, and create a class-based view.
class AboutPageView(TemplateView):
    template_name = 'about.html'
Step.3
Open ‘urls.py’ which is inside ‘mywebsite’ folder and add the following path.
path('about/',views.AboutPageView.as_view(),name='about'),Adding a ‘Contact-us’ page
Let’s add a contact us page to our website using 3 simple steps just like we made the about us page.
Step.1
Create a new file called ‘contact.html’ inside the ‘templates’ folder. Add the following line of code to that file.
<h2> This is my contact us page</h2>Step.2
Open ‘views.py’ file which is inside ‘mywebsite’ folder, and create a class-based view.
class ContactPageView(TemplateView):
   template_name = 'contact.html'
Step.3
Open ‘urls.py’ which is inside ‘mywebsite’ folder and add the following path.
path('contact/',views.ContactPageView.as_view(),name='contact'),
Creating a navigation bar
Now, let’s create a navigation bar for the website. This will help users to easily navigate through your site.
Step.1
Create a new file ‘nav.html’ inside the ‘templates’ folder. Add the following lines of code to the file.
<header>
<a href=" {% url 'home' %} "> Home </a> |
<a href=" {% url 'about' %} "> About Us </a> |
<a href=" {% url 'contact' %} "> Contact Us </a>
{% block content %}
{% endblock %}
</header>
Don’t get afraid with the {% ….. %} lines of the above code. This is the syntax of the Django framework and you will become familiar with this after some time.
Just go through the code many times, and I’m sure you will be able to get the logic of the code.
You will understand the block content section when we will use it in the next step. Note that in {% url ‘home’ %}, the ‘home’ is the name that we have given to the ‘home.html’ page in the ‘urls.py’ file.
Step.2
Now we have to add this navigation bar to all the pages of the website. So first, let’s go to ‘home.html’ and add the navigation bar there using the ‘extends’ keyword.
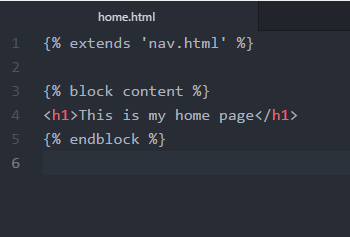
{% extends 'nav.html' %}Also, we have to make the contents lie inside the {% block content %} section. So, the content on the home page is changed like this:
{% block content %}
<h1>This is my home page</h1>
{% endblock %}
After making these changes, the ‘home.html’ file will look like this.
Similarly, make these changes to ‘about.html’ and also to ‘contact.html’ files.
Run your project
All the coding is done now, let’s go to the command line (command prompt). Navigate to your project folder (mytemplate) using the ‘cd’ command.
Now, run the server using the following command.
python manage.py runserverIf you are using MAC/Linux, don’t forget to type in ‘python3’ instead of ‘python’ for the above command.
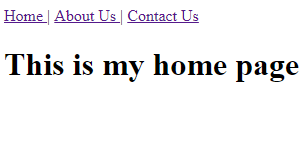
A URL will be generated after you entered the command. Copy that URL and paste it on a new tab of your browser. Hit enter.
You will see your templated website up and running.
We have done this project. I think now you have got a clear idea about template extending in Django.
Now, if we want to change something on the navigation bar, we can change that on the ‘nav.html’ file, and automatically, the navigation bar will be updated on all the pages.
You don’t need to change the code on all the pages. It saves a lot of time and headache, right? This will be very helpful when you are doing big projects that involve a lot of pages and a lot of coding.
If you enjoyed this tutorial, feel free to share it with your friends. In case you have any doubts or queries, let me know in the comments section. I will be happy to help you.

Great job! Very useful tutorial! Thank you very much! Could you please do the following minor corrections in the text:
You can see that the DIR section in that list is empty
to be changed to
You can see that the DIRS section in that list is empty
Make the following change to the DIR.
to be changed to
Make the following change to the DIRS.
‘DIR’ : [ os.path.join(BASE_DIR,’templates’) ]
to be changed to
‘DIRS’ : [ os.path.join(BASE_DIR,’templates’) ],
path(‘’,include(‘website.urls’)),
to be changed to
path(”,include(‘mywebsite.urls’)),